Black Ops 2 How to Get the Ice Staff
Outside of my day job as a project manager for a construction company, I am an avid gamer with a great passion for "Call of Duty."
Create a blizzard that lasts 10 seconds.
Screenshot: Call of Duty, BO2
Ice Staff Upgrade in Origins
The Staff of Ice is a powerful weapon in Origins that uses the Ice element. It can be upgraded by following several steps. Once upgraded, it becomes Ull's Arrow, an extremely powerful weapon that can freeze hordes of zombies. It can also be charged: This projects blocks of ice and a blizzard that freezes zombies in the area for 10 seconds.
There are a total of seven steps. Only the third and forth step are specific to this staff. The other five steps are the same for all four staves. Only the steps specific to the Staff of Ice are discussed in this guide. The five shared steps are discussed thoroughly in the How to Upgrade the Staves Guide.
In This Guide:
- Play the Match Game
- Freeze the Tombstones
- Locations of Tombstones
- The Next Step
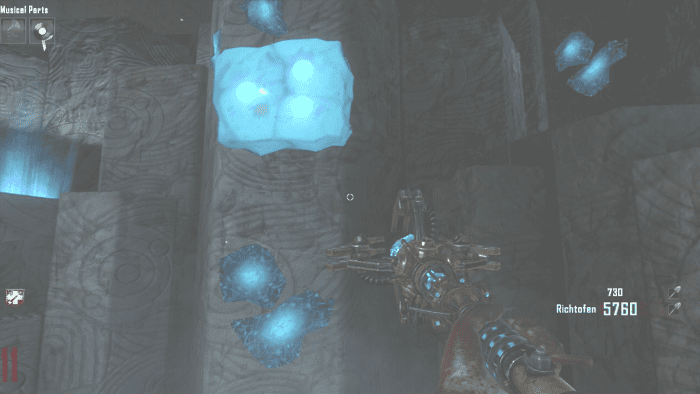
The Pillar has a blue object with dots on it.
Screenshot: Call of Duty, BO2
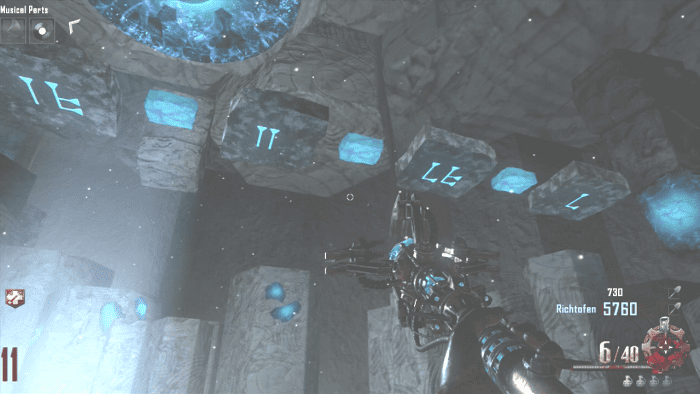
There are tiles floating above.
Screenshot: Call of Duty, BO2
Play the Match Game
Before you start this step you should have already built all four staves, and equipped the Staff of Ice.
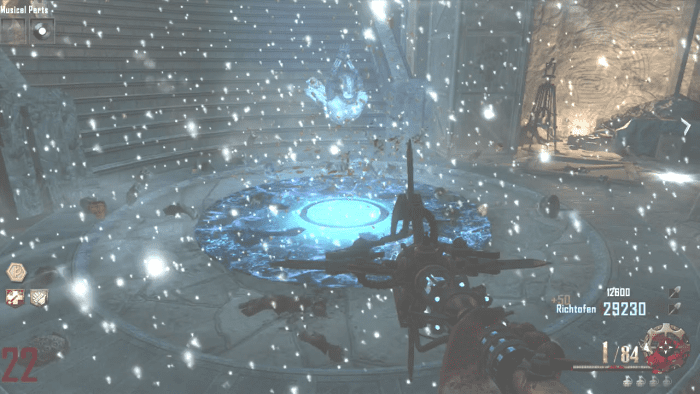
The match game will take place in the Crazy Room, which is the room that held the crystals. You can get there by creating a portal at any of the element mines. Once inside the Crazy Room, find the ice area, you should see a blue glow.
There will be tiles floating up above, and a pillar that has a blue object with dots on it. These each represent a different style of numbering system. Instead of trying to figure out the numbering system, I used trial and error. The picture below shows which tiles match the number on the pillar.
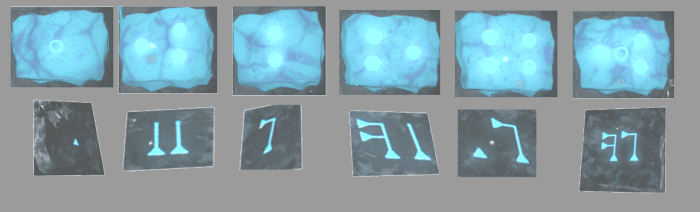
The picture above is the object from the pillar, it matches with the floating tile below it.
The dots on the tile change each time you shoot a tile. If the tile matches the pillar, the tile will flip over and the next number will appear on the pillar. If you get one of these incorrect they will all flip over, and you will need to start over.
There will be a loud noise and Samantha will talk to you, when this is completed correctly. That indicates that you can move on to the next step.
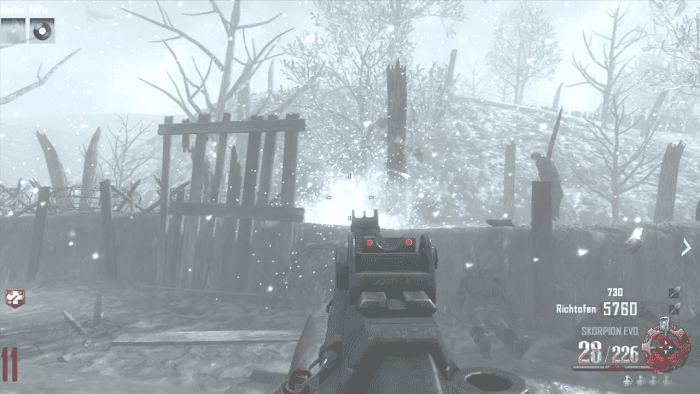
Shoot the tombstone after you have froze it with the Staff of Ice.
Screenshot: Call of Duty, BO2
Freeze the Tombstones
Three tombstones will appear after completing the match game. The next step is to first freeze, and then shatter those tombstones. You can freeze them by shooting them with your Staff of Ice, and then shatter them by shooting them with a gun.
All three tombstones are outside of the playable area, and blend in slightly with the background. It is much easier to find them if you know exactly where to look.
Tombstone Location 1
Screenshot: Call of Duty, BO2

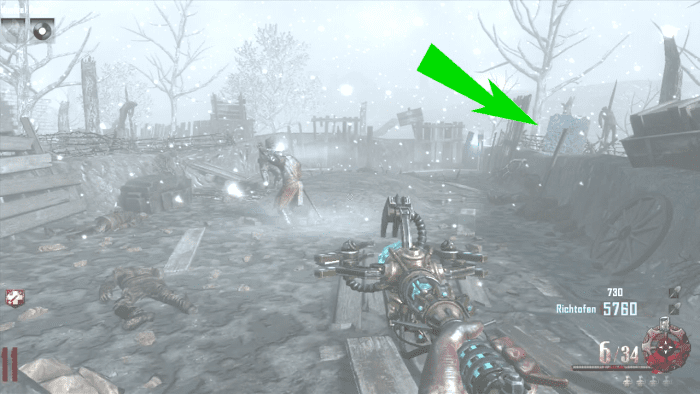
Tombstone Location 2
Screenshot: Call of Duty, BO2
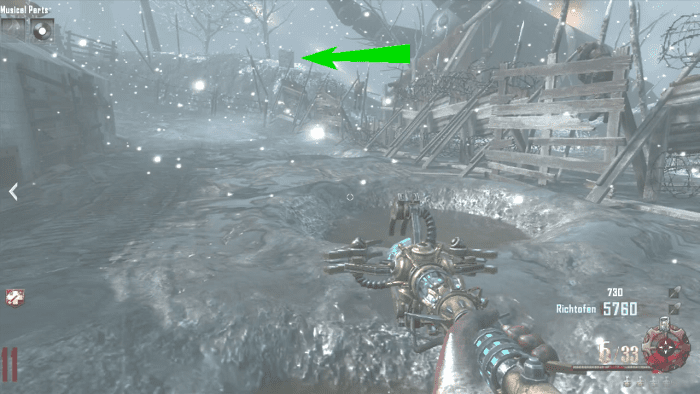
Tombstone Location 3
Screenshot: Call of Duty, BO2
Read More From Levelskip
Locations of the Tombstones
The tombstones look like normal gray tombstones. They have been in the same location every time I have upgraded the Staff of Ice. The three locations are listed below. If I find them in a different location, I will add it to the list.
Tombstone Location 1
The first Tombstone is in the mud pit beside Generator Station 4. It is across from the Spirit Chest used for the Rituals of the Ancients. It is in the elevator area that players can not access.
Tombstone Location 2
The second tombstone can be found close to the first. Walk out of the mud pit and into the next mud pit. This is the pit that can either lead towards the Church, or around the other side of the Excavation Site. It is elevated on the base of the Excavation Site.
Tombstone Location 3
The third tombstone is on the other side of the map. It is in the mud area behind the Tank Station. Like the other two tombstones, it is elevated and in a non-playable area. However, it is elevated higher than the other two tombstones.
The Next Step
After completing these two steps you can go to Step 5 in the Guide for upgrading the staves in Origins. Steps 5 through 7 are the same for all four staves.
The guide mentioned above will also give information on how to upgrade the Staff of Fire, upgrade the Staff of Wind, and upgrade the Staff of Lightning.
BO2 GOD BOIII on October 23, 2017:
https://i.ytimg.com/vi/rInNNDYHJ10/maxresdefault.j... dang this is I think all the tiles so your welcome people I dont know :)
Bryson on June 30, 2017:
Can u help me on the easter egg
Stemul32 on June 05, 2017:
Look up "Ice staff puzzle key" on images and you should find all 12 tiles and dots.
slay on April 28, 2014:
Not good but its ok
dizzle on February 01, 2014:
^Thanks a million bro, they kept changing from what the guide said
CelphMayd on September 10, 2013:
http://i.imgur.com/C5sZVMH.jpg
Heres a link with the match game icons, don't know if that's all of them, but it seems rather complete.
Black Ops 2 How to Get the Ice Staff
Source: https://levelskip.com/first-person-shooters/How-To-Upgrade-The-Staff-of-Ice-in-Origins-Call-of-Duty-Black-Ops-2-Zombies